

The lat pulldown is a cornerstone exercise in just about any gym, and for good reason. It's one of the most effective ways to build a wider, stronger back, helping everyone from bodybuilders to weekend warriors improve their posture and upper body strength. The key to unlocking its full potential lies in understanding the fundamentals: learning proper form, picking the correct grip for your goals, and progressing safely.
This guide will walk you through everything you need to know to master it.
Lat Pulldown Muscles Worked
While its name gives away the primary target, the lat pulldown is a compound movement that engages a whole team of muscles across your back and arms.
Primary: Latissimus Dorsi
Often referred to as the "lats," these are the large, wing-like muscles that give the back its width. They are the main drivers responsible for pulling the bar down toward your chest.
Secondary: Teres Major, Lower/Mid Traps, Rhomboids, Rear Delts
This group acts as the back's support crew. The teres major helps the lats with arm adduction, while the traps and rhomboids work to retract and depress your shoulder blades, ensuring a stable and powerful pull.
The rear deltoids also chip in to help extend the shoulder.
Assistants: Biceps, Brachialis, Brachioradialis, Rotator Cuff
Your arm muscles, particularly the biceps and brachialis, are heavily involved in flexing the elbow to bring the bar down. Meanwhile, the small muscles of the rotator cuff work overtime to stabilize the shoulder joint throughout the entire range of motion.
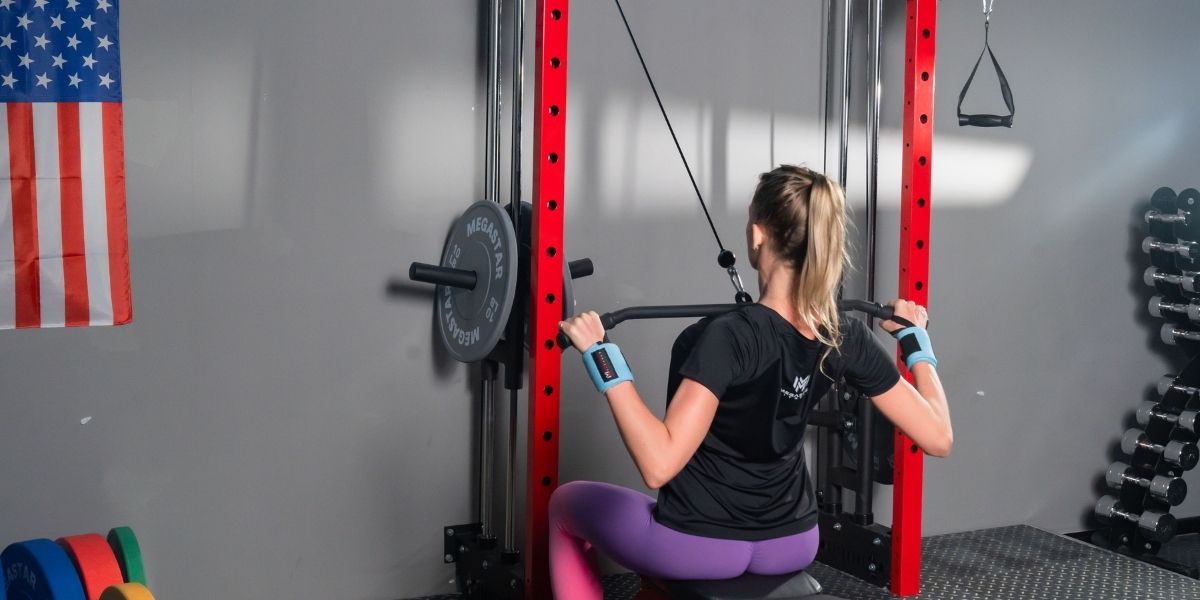
Step By Step Lat Pulldown Guide
Nailing the form is non-negotiable for getting results and staying injury-free. Follow these steps for a perfect rep.
Setup
Before you even touch the weight, get your body in the right position. Set the thigh pad so your knees are locked in gently but firmly, keeping you anchored to the seat. Lean your torso back slightly, about 10–20 degrees from vertical—this is your pulling position, and it should remain consistent throughout the set.
Finally, stand up to choose your handle and establish your grip before sitting down and unracking the weight.

Execution
With your grip set, depress your shoulder blades, pulling them down and back as if tucking them into your back pockets. This is the starting position for every rep. Initiate the pull by driving your elbows down and back toward your hips, bringing the bar to your upper chest, around your collarbone.
Pause for a brief second at the bottom, squeezing your back muscles. Then, control the weight on the way up, taking a full two to three seconds to return to the starting position with your arms fully extended.
Form Checks
Keep these cues in mind to stay on track. Maintain neutral wrists; they shouldn't be bent backward or curled forward. Avoid using momentum by swinging your torso back and forth. Focus on keeping your ribs down and your core engaged to prevent your lower back from arching excessively.
Lastly, it's generally best to skip behind-the-neck variations, especially if you have tight or cranky shoulders, as they can place the joint in a vulnerable position.
Grip And Attachments Explained
The handle you use and how you hold it can subtly shift the focus of the exercise.
Overhand Shoulder-Width
This is the standard grip and a great all-around choice. It provides a balanced focus on the lats and supporting back muscles.
Wide Overhand
A wider grip tends to put more emphasis on the upper fibers of the lats and the teres major. However, it also shortens the range of motion, so don't go so wide that you can't get a full stretch and contraction.
Neutral Close-Grip or V-Bar
Using a parallel or V-bar grip allows you to drive your elbows down and in front of your body more easily. This often feels more natural and can emphasize the lower lats. It’s a great joint-friendly option for many people.
Underhand Shoulder-Width
Also known as a reverse grip or chin-up grip, this variation brings your biceps into play more significantly and can create a strong contraction in the lower lats.
Your best bet is to choose a grip that feels comfortable on your wrists, elbows, and shoulders while still allowing you to feel the target muscles working.
Programming For Growth
How you structure your sets, reps, and rest is crucial for building muscle.
Sets, Reps, Tempo, Rest
For hypertrophy (muscle growth), a solid starting point is 3–4 sets of 8–12 or 10–15 reps. Focus on a controlled tempo, taking about 1–2 seconds to pull the weight down and 2–3 seconds to let it back up. Rest for 60–90 seconds between sets to allow for adequate recovery.
The effort should be challenging; aim to finish each set feeling like you could have done just one or two more good reps (1–2 reps in reserve).
Sample Plans
Novice: Perform 3 sets of 10–12 reps with a standard overhand grip, twice per week.
Intermediate: Use a varied approach. On Day A, focus on strength with a wide overhand grip for 4 sets of 8–10 reps. On Day B, go for higher volume with a neutral close-grip for 3 sets of 12–15 reps.
Progression And Frequency
To keep making progress, you need to challenge your muscles consistently. A simple way to do this is to add one rep to your sets each week. Once you reach the top of your target rep range (e.g., 12 reps), increase the weight by the smallest increment available (usually 2.5–5 lbs) and start back at the bottom of the rep range.
Training your back with pulldowns one to two times per week is plenty for most people. For a well-rounded back workout, make sure to pair the lat pulldown (a vertical pull) with a horizontal pulling movement, like a seated cable row or a dumbbell row.
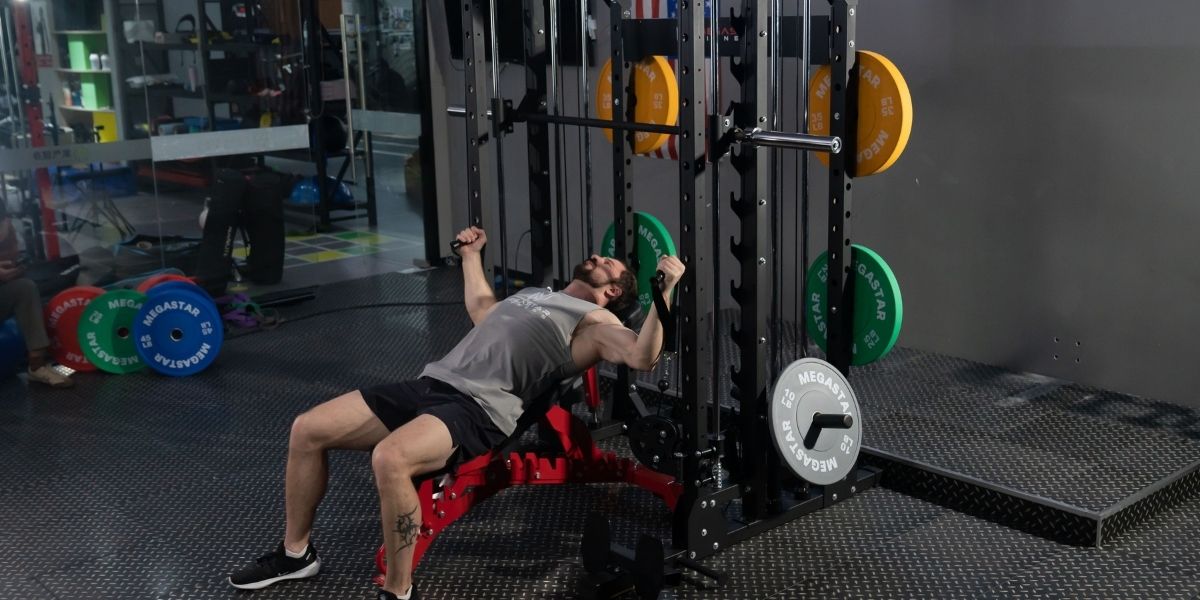
Shoulder-Friendly Options And Alternatives
If the standard lat pulldown doesn't feel right for your shoulders, or you simply don't have access to a dedicated machine, there are several excellent alternatives. Of course, a major hurdle for many is simply getting consistent access to equipment, especially in a crowded commercial gym. This is where an all-in-one home gym system becomes a true investment in your fitness journey. For instance, the Smith machines from Megastar Fitness not only include a robust high and low pulley system perfect for smooth lat pulldowns, but they also combine multiple pieces of equipment into a single footprint. This means you can seamlessly transition from your pulldowns to rows, presses, and squats without ever waiting for a machine to open up. It's an ideal solution for building a well-rounded physique from the comfort of your own home.

One-Arm Half-Kneeling Cable Pulldown
Performing the movement one arm at a time allows for a greater range of motion and can help you establish a stronger mind-muscle connection.
Straight-Arm Pulldown
This is an isolation exercise that takes the biceps out of the movement, forcing the lats to do all the work. It’s fantastic for learning how to activate your lats properly.
Assisted Pull-ups or Band Pulldowns
If a machine isn't available, using an assisted pull-up machine or looping a resistance band over a pull-up bar are great ways to mimic the movement pattern and build foundational strength.
Lat Pulldown Frequently Asked Questions
Wide grip vs shoulder-width for lat growth?
Both are effective. A shoulder-width grip allows for a longer range of motion and is a great overall mass builder. A wider grip can emphasize the upper lats and teres major for more width, but don't go so wide that you sacrifice form. It's best to include a variety in your training.
How many sets per week for results?
For most lifters, aiming for 10–20 total weekly sets for the back is a good target. This includes both vertical pulls (like pulldowns) and horizontal pulls (like rows). A beginner can see great results with as few as 6–8 sets per week.
Best grip if elbows or shoulders feel cranky?
A neutral (palms facing each other) or V-bar grip is often the most comfortable option. It places the shoulder in a more natural position and can reduce stress on the elbow joint compared to wide overhand or underhand grips.
Lat pulldown vs pull-ups for beginners?
The lat pulldown is generally better for beginners. It allows you to control the weight precisely and learn the movement pattern without having to lift your entire body weight. Once you can comfortably pulldown a significant portion of your body weight for reps, you'll be in a much better position to transition to pull-ups.
Conclusion
The lat pulldown is a top-tier back builder, but its effectiveness comes down to execution. The formula for success is simple: establish a solid setup, perform each rep with control, choose the grip that best suits your body and goals, and focus on making small, consistent progress from one week to the next.
Master these elements, and you’ll be well on your way to building a stronger, more defined back.
