

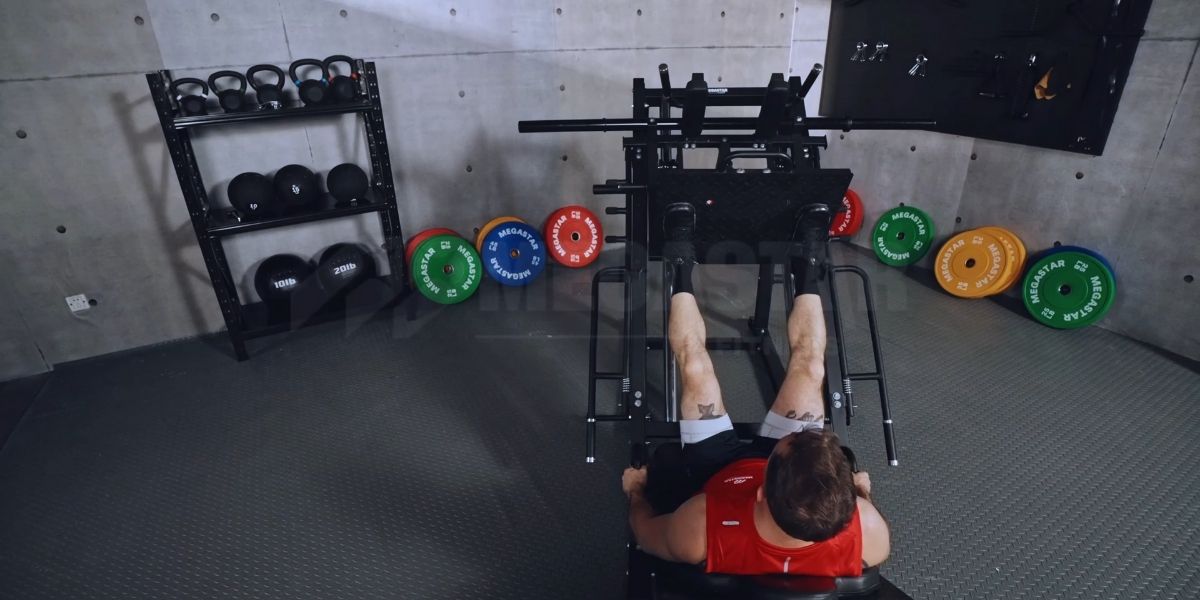
When it comes to leg presses, foot placement isn’t just a technicality—it’s a game-changer. The way you position your feet on the leg press machine can completely change how your muscles are activated, how effective your workout is, and even how safe your routine becomes. Whether you’re looking to strengthen your quads, target your glutes, or even work on your calves, the right foot placement can make a huge difference.
In this article, we’ll dive into 7 leg press foot placement variations and explain why each one is useful. By the end, you’ll have a better understanding of which foot placement is best for your goals—and how to apply them effectively.
The 7 Leg Press Foot Placement Variations
1. Standard Foot Placement
Why Use It: The standard foot placement is the most common and beginner-friendly option. Your feet are placed about shoulder-width apart, directly in the center of the platform. This position engages your quads, hamstrings, and glutes fairly evenly, making it perfect for a balanced leg workout.
When to Use: This is a great go-to position if you’re just starting out with leg presses, or if you want a general leg workout that hits all the major muscles. It’s also a good choice if you’re looking to focus on overall leg strength without isolating any particular muscle group.
2. High Foot Placement
Why Use It: Placing your feet higher on the platform shifts the focus to your glutes and hamstrings by increasing hip flexion. This position is often favored by those looking to target their posterior chain (the back of your body), which includes your glutes, hamstrings, and lower back.
When to Use: If your goal is to build or strengthen your glutes and hamstrings, a high foot placement is your best bet. This is also a great option if you’re trying to minimize knee strain during the exercise.

3. Low Foot Placement
Why Use It: When you place your feet lower on the platform, you increase knee flexion, which shifts the focus to your quadriceps. This position is perfect if you want to emphasize your quads while reducing the engagement of your hamstrings and glutes.
When to Use: Use a low foot placement when you want to focus on quad development. It’s also a great choice if you’re looking to improve your knee flexion or strength.
4. Wide Stance
Why Use It: A wide stance places your feet farther apart on the platform, engaging your inner thighs (adductors) and glutes more effectively. This position increases your range of motion and can help improve hip mobility.
When to Use: If you’re aiming to target your inner thighs and glutes, a wide stance is ideal. It’s also a good choice if you’re looking to improve your hip mobility or want a more challenging leg press.
5. Narrow Stance
Why Use It: A narrow stance, where your feet are placed close together, isolates the outer part of your quadriceps and targets the outer legs. This position reduces activation of the inner thighs and glutes, allowing for more emphasis on the outer thighs.
When to Use: If you're aiming to work your outer quads or correct muscle imbalances between the inner and outer legs, this is a good option. It can also be useful for building more definition in the outer thigh area.
6. Single-Leg Foot Placement
Why Use It: The single-leg press variation involves pressing with one leg at a time, which helps to address muscle imbalances between your legs. This variation increases the intensity and ensures that each leg is working on its own, which is great for building unilateral strength.
When to Use: If you notice any muscle imbalances or want to improve the strength of one leg over the other, using a single-leg press can be very beneficial. It’s also a good option for athletes or anyone looking to work on strength and coordination.

7. Toes-Up (Calf Raise) Foot Placement
Why Use It: In this variation, your feet are placed near the bottom of the platform with your toes pointed upwards, allowing you to focus on your calf muscles. By pushing through the toes, you can isolate and strengthen your calves.
When to Use: If your goal is to build calf strength or add more variety to your leg press routine, this is the perfect foot placement for you. It’s also great for those who want to focus on their lower legs without engaging the rest of the body as much.
How to Choose the Right Leg Press Foot Placement for Your Goals
Not all leg press foot placements are created equal, and which one you choose depends largely on what you're trying to achieve. Here’s a quick guide:
For General Strength If you're looking to build overall leg strength, start with the standard foot placement. This will give you a balanced workout that targets all the major muscles in your legs.
For Muscle Targeting Use high foot placement to emphasize glutes and hamstrings, or low foot placement to focus on the quads. Wide and narrow stances can be used to isolate the inner and outer thighs, respectively.
For Injury Prevention If you have any knee or back issues, adjusting your foot placement can help alleviate pressure on certain joints. For instance, a high foot placement can reduce knee strain, while a narrow stance might be easier on the hips.
Common Mistakes and How to Avoid Them
While the leg press is a great machine for building strength, there are a few common mistakes you should avoid to ensure you're getting the most out of your workout:
Feet Too High or Low Placing your feet too high or too low can put unnecessary strain on your knees or lower back. Always aim for a position where your knees form a 90-degree angle at the bottom of the movement.
Knee Alignment Keep your knees aligned with your toes throughout the movement. Letting your knees cave inward or outward can lead to strain and injury.
Not Using Full Range of Motion Avoid stopping short of the full range of motion. Make sure to fully extend and lower your legs during each rep to maximize muscle activation.
Elevate Your Leg Press Workouts with Megastar Fitness Equipment!
Ready to take your leg press training to the next level? Megastar Fitness offers top-of-the-line gym equipment designed for maximum performance and safety. Whether you're targeting your quads, glutes, or calves, our leg press machines are built to give you the most out of every workout.
Explore our high-quality, durable Leg Press Machines to enhance your fitness routine and ensure you're getting the best results from every foot placement variation. With adjustable foot platforms and ergonomic designs, our machines support a range of positions, making them perfect for both beginners and advanced users.

FAQs
How can I avoid knee pain when using the leg press machine?
To avoid knee pain, ensure that your knees are aligned with your toes throughout the movement and don’t extend beyond your toes at the bottom of the press. Also, consider using a high foot placement to reduce knee flexion and alleviate strain.
Is the single-leg leg press better for muscle imbalances?
Yes, using a single-leg press can help address muscle imbalances between your legs by ensuring that each leg works independently. It also promotes better strength and coordination on each side.
Can I use leg press foot placement variations to enhance my calf muscles?
Absolutely! By using the toes-up (calf raise) foot placement, you can focus the movement on your calves. This isolates the calf muscles and helps to build strength and definition in the lower legs.
How do I know if I’m using the correct foot placement?
If you feel tension in the right muscles without experiencing discomfort or pain in your knees, hips, or lower back, you’re likely using the correct foot placement. Always ensure your knees track in the same direction as your toes and avoid locking them out at the top of the movement.
How often should I change my foot placement on the leg press?
You can vary your foot placement every few weeks or after a few sessions to challenge different muscle groups and avoid plateaus. Changing foot placements regularly can help keep your workouts fresh and prevent muscle adaptation.
Conclusion
Foot placement on the leg press machine plays a huge role in the effectiveness of your workout. By experimenting with the 7 different foot placements outlined in this article, you can target specific muscle groups, avoid injury, and push past your training plateaus. Whether you’re looking to focus on your quads, glutes, or calves, there’s a foot placement that suits your needs.
Now that you know the benefits of each variation, it’s time to give them a try. Mix up your leg press routine, track your progress, and find out which foot placement works best for your goals. Happy lifting!
